Types of Commercial Refrigeration Equipment for Restaurants

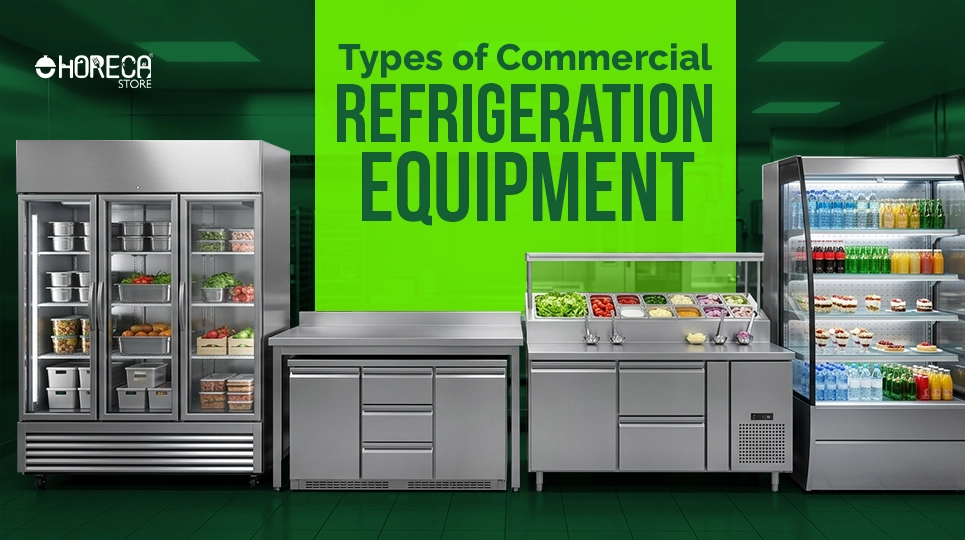
Table of Contents
In a home kitchen, a broken refrigerator is a minor inconvenience that costs you a carton of milk; in a professional kitchen, that same failure is a catastrophic event costing thousands in spoiled inventory and risking an immediate shutdown by the health inspector. The core difference lies in usage intensity: while a domestic unit might be opened ten times a day, a commercial line cook opens their reach-in cooler fifty times an hour during a dinner rush. Commercial refrigeration equipment is designed not just to store food, but to survive this brutal workflow while protecting your bottom line.
To handle this volume, professional units operate as industrial tools rather than simple appliances. They rely on heavy-duty compressors designed for rapid "recovery time"—the ability to snap back to safe holding temperatures seconds after a warm draft enters. Furthermore, health codes almost universally require equipment to be NSF Certified (National Sanitation Foundation), a standard verifying that the unit uses easy-to-clean materials and designs that prevent bacteria buildup. Using a residential fridge in a commercial setting isn't just a durability risk; according to most local ordinances, it is a legal violation.
Navigating the market for commercial fridges requires knowing exactly what separates a professional workhorse from a domestic decoration. Before browsing specific models, check for these three distinctions that define true commercial gear:
- Visible Temperature Gauges: External displays allow staff to monitor safety without opening the door.
- Coved Corners: Interior corners are rounded rather than sharp to prevent food debris accumulation.
Reach-In vs. Walk-In: Choosing the Right 'Lungs' for Your Kitchen
Every restaurant kitchen breathes through its refrigeration. If your storage is too small, you can’t buy in bulk to save money; if it’s too large, you’re paying to cool empty air. The decision between a standard reach-in unit and a massive walk-in cooler usually comes down to the "15-case rule." If your daily deliveries exceed 15 cases of produce or meat, relying solely on reach-ins will clutter your aisles and overwhelm your staff. A walk-in acts as your central warehouse, offering a high floor-space-to-volume ratio that allows you to accept pallet-sized deliveries, whereas reach-ins are your "active" storage for immediate access during a rush.
Reach-ins offer a specific workflow advantage that walk-ins cannot: strategic placement. While a walk-in is a destination, a reach-in can be placed right on the cookline. For high-volume kitchens, pass-through refrigerators are a game-changer. These units have doors on both the front and back, allowing kitchen staff to slide finished cold plates (like salads or desserts) into the unit from the prep side, while servers retrieve them from the other side. This creates a seamless "cold bridge" that prevents front-of-house staff from entering the hot kitchen, reducing collisions and traffic jams.

However, upgrading isn't just about space—it’s about calculating the "walking tax." A walk-in cooler often requires structural modification to the building and is usually tucked away in a corner or even outside to save prime kitchen real estate. If a line cook has to walk 40 feet to the walk-in for a backup container of tomatoes during a Friday night slam, that is time lost. Successful operators use a hybrid approach: bulk inventory lives in the walk-in, while reach-ins are stocked before every shift to minimize travel time.
Quick Comparison: Reach-In vs. Walk-In
- Capacity: Reach-ins handle 20–70 cubic feet; Walk-ins start around 150 cubic feet and go up infinitely.
- Footprint: Reach-ins fit in tight gaps; Walk-ins require dedicated structural space and often drainage installation.
- Best Use: Reach-ins are for active ingredients needed immediately; Walk-ins are for bulk storage and receiving orders.
- Cost: A high-end reach-in costs less upfront but limits bulk-buying discounts. Walk-ins require a high initial investment ($8,000+) but lower food costs long-term.
Once you have your bulk storage sorted, the next challenge is managing ingredients that sit right on the prep line.
From Salad Bars to Sandwich Stations: The Power of Prep Refrigeration
Speed is currency during a lunch rush. If your staff has to turn around to grab cheese or lettuce from a reach-in for every single order, you are losing seconds that add up to lost tables. This is where prep tables—refrigerated units with a workspace on top and accessible ingredient pans—become essential. The biggest decision here is choosing between a standard top and a mega-top. A standard unit offers a wider cutting board for assembling large pizzas or subs, while a mega-top sacrifices some work surface to hold up to 50% more ingredient pans. If your menu relies on complex customization, like a build-your-own burrito bowl concept, the extra prep table capacity of a mega-top is non-negotiable.

In tighter kitchens, vertical space is often blocked by shelving or pass-through windows, forcing you to look down for storage solutions. Undercounter refrigerators for compact prep stations slide neatly beneath countertops, turning dead space into active cold storage. Modern efficiency has brought us dual-temperature refrigeration units (often drawer-based), which can switch between fridge and freezer modes or offer split zones. Imagine having fresh garnish chilled in the top drawer while backup frozen fries sit ready in the bottom drawer, all within arm's reach of the fryer. This optimization eliminates the "walking tax" entirely for line cooks, keeping them planted at their station where they are most productive.
Essential Features for a High-Volume Prep Station:
- Cutting Board Depth: Ensure it’s deep enough (10” vs. 19”) to plate your food without risking spills into the open pans.
- Pan Configuration: Check if the rails allow for flexible layouts (e.g., swapping two small 1/6 pans for one larger 1/3 pan) to match your changing menu.
- Insulated Lids: Look for solid, insulated covers that lock in cold air during off-hours to reduce energy consumption.
- Heavy-Duty Casters: Wheels are mandatory for pulling the unit out to clean the grease and flour that inevitably accumulates underneath.
While prep tables keep the back-of-house running smoothly, your front-of-house equipment needs to do double duty: keeping product cold and looking good while doing it.
Selling the Sizzle While Keeping it Cold: Display and Bar Cooling
Your walk-in cooler protects your inventory, but your front-of-house equipment has to sell it. The primary goal of refrigerated display cases for bakery and deli setups is to balance maximum visibility with specific preservation needs. A standard refrigerator blows cold air aggressively, which is fine for sealed milk jugs but disastrous for an uncovered cheesecake or a tray of sliced roast beef. Specialized deli cases often use "gravity coils"—cooling elements at the top of the case that let cold air gently fall over the food—to maintain high humidity so your expensive proteins don't dry out and turn brown. Conversely, bakery cases require precise humidity controls to ensure frostings don't weep and pastries stay crisp, proving that not all cold air is created equal.
For pre-packaged drinks, the strategy shifts from delicate preservation to impulse generation. Commercial beverage coolers with glass doors utilize bright LED lighting to make labels pop, encouraging customers to grab a drink while waiting for their order. This visibility creates a significant sales lift, but it comes with an energy price tag since glass insulates poorly compared to solid steel. To offset this, these merchandisers are engineered with oversized compressors designed to recover internal temperatures rapidly after the door has been opened for the hundredth time during a dinner rush.
When moving from bottles to tap, the challenge becomes transportation. If your kegs are stored directly under the bar, a simple air-cooled system works fine. However, if you are pumping beer from a walk-in located 50 feet away, the beer will warm up in the lines, resulting in profit-killing foam. This is where glycol cooling systems for beverage dispensing become necessary. These systems circulate a chilled food-grade antifreeze mixture alongside the beer lines to keep the liquid ice-cold regardless of distance.
- Direct-Draw (Air-Cooled): Best for short runs (under 25 feet); affordable and simple, but limits where you can place your kegs.
- Remote Systems (Glycol-Cooled): Essential for long runs (up to hundreds of feet); ensures consistent pouring temperature but requires a higher upfront investment.
With your sales-driving equipment sorted, we can move to the piece of technology that actually allows you to manipulate time in the kitchen.
The 'Time Travel' Tech: Why Every Quality Kitchen Needs a Blast Chiller
Putting a 5-gallon pot of hot soup directly into your walk-in cooler is a rookie mistake that endangers your entire inventory. Not only does the ambient heat force your compressor to work overtime, but the soup also lingers in the temperature "Danger Zone" (40°F–140°F) for hours, inviting rapid bacterial growth. This is where commercial blast chillers for food safety standards become indispensable. These units use high-velocity fans and powerful compressors to strip heat away from food aggressively, functioning like a reverse microwave to lock in freshness.
Beyond simple safety, these units preserve the culinary integrity of your menu. When food freezes slowly, large ice crystals form, rupturing cell walls and turning a beautiful steak or delicate vegetable into mush upon thawing. By freezing instantly, blast chillers create microscopic crystals that leave the food's texture unchanged. The difference in performance is stark:
- Standard Walk-In Cooling: Takes 12–20 hours to cool 5 gallons of stock to safe levels; high risk of spoilage and texture loss.
- Blast Chiller: Drops the same stock from 160°F to 38°F in under 90 minutes; ensures HACCP compliance and shelf-life extension.
While the blast chiller protects your cooked food, the ice machine is the silent engine of your beverage service, and choosing one requires balancing utility costs against kitchen temperature. Ice is legally defined as food, meaning your production method must be sanitary and consistent, but the biggest decision you will face is how the machine cools itself.
Selecting the right engine for your ice maker comes down to a battle between your water bill and your HVAC system. Air-cooled vs water-cooled ice machines is the most common debate in equipment purchasing. Air-cooled units are cheaper to operate because they don't consume extra water, but they pump significant heat back into your kitchen, which can be brutal in a small, unventilated space. Conversely, water-cooled units are incredibly efficient and keep the room cool, but they can double your water consumption, making them a costly choice in areas with high utility rates.
Once you’ve selected the right machinery, you have to decide where to install the noisy, heat-generating components.
Location, Location, Location: Why Your Compressor Placement Dictates Your Utility Bill
Your kitchen's specific environment—not just your budget—should dictate whether your refrigerator’s "heart" sits on the roof or the floor. Top-mounted compressors are the standard for dusty environments like bakeries because they stay clear of flour settling on the ground, but they lose efficiency in kitchens with low ceilings where hot air gets trapped. Conversely, bottom-mounted units offer easier service access and "no-stoop" storage, yet they can act like vacuums for floor grease and dirt. Misjudging this airflow dynamic forces the unit to run longer cycles, inflating your electricity costs and stressing the mechanical components.

Once installed, dialing in the perfect environment is critical for preserving inventory value. While health codes generally mandate keeping frozen foods below 0°F, the ideal temperature settings for commercial walk-in freezers usually hover between -10°F and -5°F. This buffer protects your stock from "freezer burn" caused by slight temperature spikes during automatic defrost cycles. However, even perfect settings won't save a machine that cannot breathe. Preventing compressor failure in commercial refrigerators is rarely about fixing broken parts; it is almost always about cleaning dirty ones. A clogged condenser coil wraps your compressor in a thermal "blanket," causing it to overheat and eventually seize.
To keep your equipment running efficiently and avoid a costly mid-shift breakdown, implement this simple preventative maintenance for industrial cooling units checklist:
- Brush condenser coils monthly to remove dust and restore airflow.
- Inspect door gaskets for cracks that leak expensive cold air.
- Clear debris from the drain lines to prevent internal icing.
- Verify internal thermometers weekly against a calibrated handheld probe.
- Listen for clicking sounds or vibrations that indicate a struggling motor.
With your maintenance routine established, you are ready to finalize your purchasing strategy.
Your 24-Hour Cooling Action Plan: From Blueprint to First Service
You can now look past the stainless steel shine and see exactly how different types of commercial refrigeration equipment impact your kitchen's pulse. Instead of buying blindly, apply a simple strategy: determine your immediate storage needs and add a 20% buffer. Learning how to size restaurant refrigeration systems with this margin ensures you can handle menu expansion without straining your compressor or overcrowding your shelves.
To turn this knowledge into a functional kitchen, follow this "Essentials First" purchase hierarchy:
- Core Storage: Secure a reliable Reach-in or Walk-in first to safeguard bulk inventory.
- Workflow Engine: Select a Prep Table that specifically matches your menu assembly (sandwich vs. pizza).
- Sales Drivers: Add Merchandisers or Bar Coolers only after the back-of-house is fully operational.
Your refrigeration is an active partner in your success, not just a passive utility. Protect that investment by establishing a "day one" maintenance routine, specifically keeping coils clean and gaskets tight. Prioritizing durable, energy-efficient refrigeration for commercial food service reduces long-term overhead and guarantees that when the lunch rush hits, your kitchen is ready to perform.

About Mike Anderson
Commercial Refrigeration & HORECA Industry Expert
The author is a seasoned specialist in commercial refrigeration systems, sharing practical insights to help hospitality businesses select the right equipment for efficiency, food safety, and long-term cost savings. With over 15 years of industry experience, he stays updated on global trends in energy-efficient and sustainable cooling solutions.
Frequently Asked Questions
Commercial refrigeration equipment refers to cooling systems designed to store perishable food at safe temperatures in restaurant kitchens and foodservice environments. These units typically maintain 33°F to 40°F for refrigeration and 0°F (-18°C) or lower for freezing, in line with FDA food safety guidelines. They are built for continuous operation and heavy daily use.
The main types include reach-in refrigerators, walk-in coolers, freezers, prep tables, undercounter refrigerators, and merchandiser units. Each type serves a specific function, such as bulk storage, food preparation, or display. Reach-in units typically offer 20–70 cubic feet of storage, while walk-ins provide significantly larger capacity.
A reach-in refrigerator is a standalone unit with smaller capacity, while a walk-in refrigerator is a large storage space that can be entered physically. Reach-ins typically store 20–70 cubic feet, whereas walk-ins can exceed 1,000 cubic feet, making them suitable for high-volume restaurant operations.
Commercial refrigeration equipment should maintain temperatures between 33°F and 40°F for chilled storage and 0°F or lower for frozen storage. According to FDA guidelines, these temperature ranges prevent bacterial growth and ensure food safety in restaurant kitchens.
A prep table refrigerator is a unit that combines refrigerated storage with a work surface for food preparation. These units typically hold ingredients in pans at 33°F to 40°F while providing a countertop for assembling dishes. They are commonly used in pizzerias, sandwich shops, and fast-service kitchens.
A merchandiser refrigerator is a display unit designed to showcase beverages and packaged foods while maintaining safe temperatures. These units usually operate between 33°F and 40°F and feature glass doors and lighting. They are commonly used in retail areas and front-of-house restaurant spaces.
Commercial refrigeration equipment should have NSF certification for sanitation, UL certification for electrical safety, and ENERGY STAR certification for energy efficiency. NSF certification ensures compliance with hygiene standards required in foodservice environments, while ENERGY STAR indicates reduced energy consumption.
Energy consumption varies by type, with smaller units using 1–4 kWh per day and larger systems using 6–12 kWh per day. ENERGY STAR-certified equipment can reduce energy usage by 10–20% through improved insulation and compressor efficiency. Energy efficiency is important for reducing operating costs.
Commercial refrigeration equipment typically lasts 10 to 15 years with proper maintenance and regular servicing. Lifespan depends on usage, build quality, and environmental conditions. Cleaning condenser coils every 3–6 months helps maintain efficiency and extend equipment life.
Choosing the right equipment involves evaluating storage capacity, kitchen space, energy efficiency, and type of operation. Restaurants should select units that maintain FDA-recommended temperatures, meet NSF standards, and fit workflow requirements. Proper selection ensures efficient storage, food safety, and smooth kitchen operations.
Comments
0 comments
Login to Comment
Join the conversation! Please log in to share your thoughts.
No comments yet
Be the first to share your thoughts!