Your menu serves as the exact blueprint for your kitchen workspace. Before you buy a single spatula or expensive range, you must realize that a restaurant is essentially a manufacturing factory, and the appliances are your heavy machinery. Think of the difference between your home kitchen and a commercial space like the difference between a family sedan and an 18-wheel delivery truck. While both can pick up groceries, only the truck is built to handle constant, punishing daily use without breaking down. Figuring out how to choose the right commercial kitchen equipment for your restaurant begins with matching your machinery to your factory's daily output.
Far too many new operators drain their startup budgets buying shiny appliances based on desire rather than necessity. According to common industry knowledge, buying cheap or mismatched gear often leads to financial disaster once the hidden costs of massive energy pulls and constant emergency repairs pile up. This is where you must understand Total Cost of Ownership—a concept that calculates not just the sticker price on the box, but the lifetime expenses of running, maintaining, and eventually replacing a machine. Purchasing a bargain-basement fryer might save a thousand dollars today, but it will bleed your profits through inefficient gas usage and frequent breakdowns over the next three years.
Translating a specific recipe into a required gear list forces you to buy only what generates profit. Consider a simple smash burger on your menu. Preparing this effectively requires a heavy-duty flat-top griddle for the sear, a refrigeration unit holding the raw patties at a safe temperature just steps away, and an exhaust hood powerful enough to pull heavy grease out of the building. You are not just buying restaurant equipment; you are purchasing a specific workflow designed to get that burger to the customer in under ten minutes.
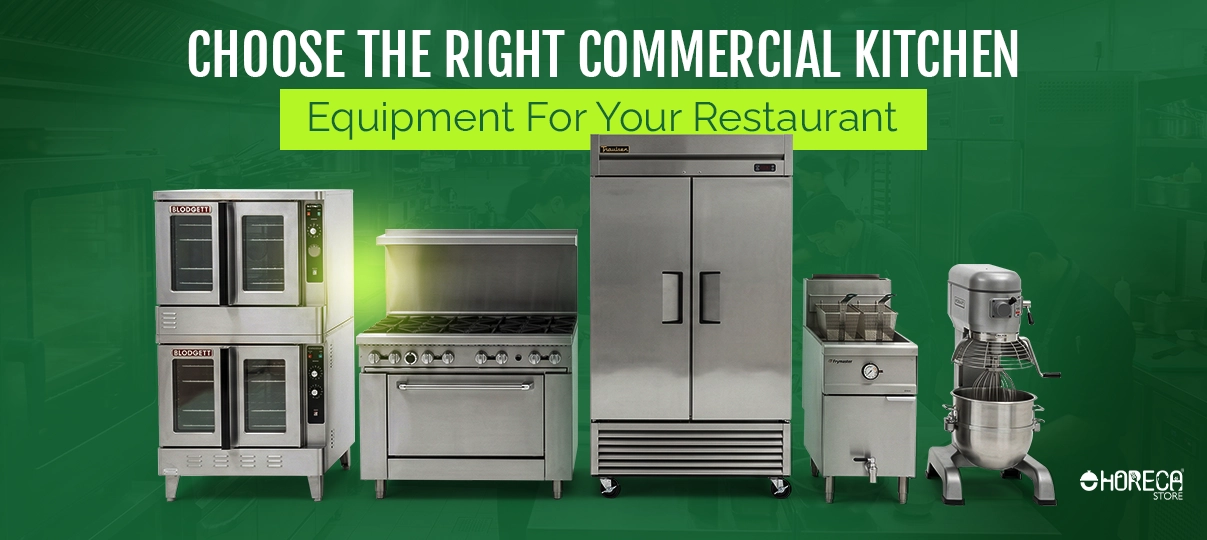
Organizing this massive undertaking becomes much easier when you break the space down into standard functional zones. Veteran kitchen designers typically divide commercial kitchen equipment into the "Core Four" categories: refrigeration, cooking, prep, and warewashing (commercial cleaning and sanitizing). Mastering these four areas ensures your staff can store ingredients safely, cook them efficiently, and clean up fast enough to survive the dinner rush.
Why Your Menu is the Only Blueprint You Need
Your draft menu is actually a hidden shopping list. Many new operators make the expensive mistake of buying standard kitchen appliances before finalizing their recipes, resulting in cramped workspaces. Every inch of your kitchen is "prime real estate"—valuable space that should only hold tools generating daily profit. To protect this area, you must eliminate single-use gadgets that gather dust and focus instead on multi-functional gear.
Turning those recipes into a concrete equipment list requires a systematic approach for true commercial kitchen layout optimization. Follow this four-step 'Recipe-to-Gear' audit process:
- Deconstruct: Break down one menu item into every physical step of its preparation.
- Map: Assign each prep and cooking step to a specific machine.
- Calculate Throughput: Determine exactly how many meals per hour this equipment must produce during your busiest rush.
- Consolidate: Identify where one versatile machine can replace multiple single-use tools.
Once you know exactly what gear your throughput demands, the next hurdle is buying machines that health inspectors actually approve. Before you start looking at price tags, you must learn to recognize the industry's mandatory safety markers.
NSF and UL: Decoding the 'Shields' of Food Safety
Finding cheap equipment online feels great until a health inspector red-tags it for lacking proper certifications. Think of the NSF mark as a vital shield for your business, proving your gear meets rigorous NSF sanitation standards for food equipment. Residential appliances usually hide tiny crevices and exposed screws—classic "dirt traps" where bacteria silently multiply. Conversely, NSF-certified gear features smooth, welded seams your staff can easily sanitize, letting you confidently prove your operational compliance to any visiting inspector.
While NSF prevents foodborne illness, UL (Underwriters Laboratories) protects your physical building from electrical and fire hazards. This secondary shield ensures your appliances meet strict commercial kitchen fire safety compliance rules, stopping a budget fryer from short-circuiting during a dinner rush. Recognizing the three most important certification marks—NSF, UL, and their widely accepted ETL equivalent—guarantees you are purchasing genuine, legal commercial durability. Now that your foundational equipment choices are certified safe, the next critical decision is your power source: gas or electric.

The High Cost of Cheap Utilities: Gas vs. Electric Ranges
Choosing between heavy duty gas vs electric ranges dictates your entire build-out budget. Gas power is measured in BTUs (British Thermal Units), a rating of maximum heat output. High BTUs ensure fast "recovery time"—the minutes it takes a cooking surface to reheat after cold food hits it. However, high-heat gas triggers expensive industrial ventilation and hood requirements to safely exhaust fumes.
Electricity can sometimes bypass those massive hood costs, yet it introduces structural hurdles. Commercial electric equipment rarely uses standard outlets. Instead, it demands "phase power"—specifically 3-phase electricity, an industrial wiring setup that delivers massive, continuous energy without tripping breakers. If your storefront only features residential wiring, paying to upgrade the electrical panel might equal the cost of trenching a new gas line.
Balancing your menu's volume against the building's existing infrastructure is the only way to avoid budget-breaking surprises:
| Feature | Commercial Gas Ranges | Commercial Electric Ranges | | :--- | :--- | :--- | | Setup Costs | High (Gas lines, strict hoods) | Varies (Requires 3-phase panel) | | Performance | Rapid recovery time | Even, consistent heating | | Best Fit | High-volume restaurants | Small cafes, historic spaces |
Once your core utilities are established, you can explore multitasking machines that maximize your kitchen's footprint.
Mastering the 'Combi' Revolution: Is One Oven Better Than Three?
Fitting standard kitchen appliances into tight floor plans forces owners to choose between baking or steaming. Enter the "Combi-Oven"—a single machine blending a convection oven's dry heat with a steamer's humidity control cooking. Instead of just blowing hot air, this hybrid injects precise moisture into the chamber to perfectly roast a juicy, crispy chicken in one cycle.
The true benefits of multi-functional combi ovens lie in massive space efficiency. Merging a convection oven, holding cabinet, and steamer into one footprint reclaims crucial prep space. Think of it as a culinary smartphone replacing your camera, calendar, and telephone. While the initial sticker shock is high, replacing three machines with one dramatically lowers your total ventilation and equipment costs.
Deciding if this investment makes sense depends entirely on your menu's volume. A busy cafe quickly recoups the steep entry cost through faster throughput and reduced food shrinkage, whereas a simple burger joint won't need advanced steam features. Once you lock in your cooking footprint, you must protect the raw ingredients heading into those ovens by accurately sizing your refrigeration.

Calculating Your Cold Chain: How to Size Refrigeration Without Wasting Cash
Buying the biggest fridge you can afford is a common trap that eats floor space and spikes utility bills. Smart kitchen design divides the cold chain into bulk storage coolers and "point-of-use" refrigeration. Point-of-use units are small, under-counter fridges placed directly on the cooking line so chefs never have to walk away to grab ingredients. When installing these, always leave adequate airflow clearance—the physical empty space required around the machine to prevent the motor from overheating. To protect your operating budget, always select Energy Star certified restaurant appliances, which routinely save owners $300 or more annually on electricity costs.
Accurately estimating your required space prevents overcrowded shelves and costly food spoilage. When figuring out how to calculate commercial refrigeration capacity, use this baseline formula depending on your delivery frequency:
- Standard Deliveries: 1 cubic foot per 10 weekly meals.
- Heavy Fresh Produce: 1.5 cubic feet per 10 weekly meals.
For a typical 50-seat restaurant serving 500 meals a week, this means you will need roughly 50 cubic feet of dedicated cold storage to operate efficiently.
Sizing your coolers perfectly keeps ingredients safe, but the physical durability of those machines determines how long they survive a chaotic kitchen environment. The shiny metal exterior on that new point-of-use prep table might look rugged, but appearances can deceive. The true lifespan of your tables depends on their specific steel grade.
Grade 304 vs. 430 Stainless: The Invisible Difference That Costs Thousands
Walk into any showroom, and every metal table looks identical. However, the lifespan of your restaurant equipment depends on its chromium-nickel content, an invisible blend preventing acidic rust. To spot the difference, perform the "Magnet Test." If a magnet sticks strongly to the surface, it is cheaper 430-grade steel lacking protective nickel. If the magnet slides off, you have found premium grade 304 stainless steel durability, which is the gold standard for resisting corrosion.
Beyond chemistry, you must choose the right "gauge" (thickness), where a lower number indicates stronger steel. A heavy-duty 14-gauge station easily survives violent meat cleaving, while a thinner 18-gauge table works perfectly for lightly rolling dough. Regardless of your choice, extending the life of your tables by 10 years requires daily cleaning with non-abrasive cloths and mild detergents to prevent microscopic, bacteria-trapping scratches.
Securing solid work surfaces protects your daily operations, but tables are just a fraction of your total infrastructure. Once your prep areas are established, you must look upward to the systems keeping your staff safe, particularly ventilation and fire suppression.
Ventilation and Fire Safety: The Most Expensive Square Foot in Your Building
Your cooking lineup dictates your ventilation needs, which often become the most shocking expense in a new build. To avoid costly code violations, you must know if you need a Type I hood, which extracts dangerous grease from fryers, or a Type II hood, which simply removes heat and condensation from dishwashers. Regardless of type, health inspectors require your canopy to extend at least six inches past your equipment on all sides to properly capture escaping fumes.
Pulling massive volumes of smoky air out of your building creates a vacuum unless you actively replace it. This is where "make-up air" enters your industrial ventilation and hood requirements, literally pumping fresh outdoor air back into the kitchen so your dining room doors can physically open without intense suction.
Protecting this heavy-duty airflow network requires strict commercial kitchen fire safety compliance, anchored by an "Ansul system" that automatically sprays fire-smothering chemicals if flames ever reach the canopy. You must proactively budget for mandatory semi-annual inspections and professional duct cleanings to keep this infrastructure legal. Once your heavy equipment and safety systems are secured, shift your focus to the essential smallwares that keep operations running smoothly.

Smallwares Strategy: The Checklist for the 'Little Things' That Stall Openings
Most owners obsess over massive ovens, forgetting that missing tongs can grind dinner service to a halt. Building your essential restaurant smallwares checklist requires strategic math, starting with "par levels"—the baseline number of items you need to survive one full dining turnover without stopping to wash dishes. A safe rule is 1.5 times your seating capacity for front-of-house plates. Behind the line, commercial kitchen layout optimization demands standardized containers. Enter "Gastronorm" (GN) sizing, a universal measurement system ensuring your prep pans fit perfectly into steam tables or cooling rails without unnecessarily transferring food.
Buying cheap residential tools guarantees wasted money, so always choose commercial high-heat silicone over basic plastic that melts instantly on hot griddles. To avoid opening-day panic, use the 'Essential Core' smallwares checklist for a starting line:
- Standardized GN pans and matching lids
- High-heat silicone utensils and spatulas
- Digital scales for exact portion control
- 1.5 par levels of flatware and glassware
With these daily operational tools secured, the final hurdle is financing your heavy equipment to protect your opening-day cash flow.
Leasing vs. Buying: Protecting Your Cash Flow During Month One
Draining capital on heavy machinery is a classic rookie mistake. When weighing leasing vs buying restaurant equipment, your primary goal is protecting your opening-day cash flow. Financing offers two main paths to acquire gear without emptying your bank account. A "Dollar Buyout" acts like a traditional loan where you own the item at the end of the term for exactly one dollar—ideal for permanent fixtures. Conversely, a Fair Market Value (FMV) lease lets you simply rent the gear, giving you the flexibility to return it or buy it at its current worth later.
Tax benefits heavily influence which financial path you should take. If you purchase the gear, you can claim "Depreciation," a rule that lets you deduct the machine's declining value from your taxes over time. Programs like Section 179 even allow year-one full-price write-offs, dramatically boosting the cost-effectiveness of high-efficiency fryers. Alternatively, if you sign a lease, always negotiate a "service grace period" to ensure you aren't paying monthly fees before the unit is actually installed.
Exploring the used market is another valid strategy, provided you audit machines carefully. Watch for glaring red flags like brittle door gaskets or excessively noisy compressors struggling to maintain temperature. Regardless of how you acquire your tools, a sudden breakdown can paralyze your kitchen. Anticipating these emergency repairs requires a thorough evaluation of your warranty terms.
Warranty Terms: Reading the Fine Print Before the Machine Breaks
Assuming a warranty is a complete safety net is a costly oversight; evaluating equipment warranty terms carefully reveals hidden risks. A major trap is coverage replacing "Parts" while charging hundreds for the technician's "Labor." Before purchasing, verify the brand has a local "Authorized Service Agent"—a certified mechanic officially approved to perform warranty repairs. If they operate hours away, you pay their travel costs. Furthermore, beware the "pro-rated warranty." This policy shrinks your financial coverage as the machine ages, leaving you with partial bills in later years.
Maintaining that contract demands strict preventative maintenance for kitchen machinery. Manufacturers quickly void policies for basic negligence. For example, skipping a $500 water filter can ruin a $5,000 boiler and instantly cancel your coverage. Always check your paperwork for these deal-breaker clauses:
- Labor exclusions: Leaving you paying the repairman's hourly rate.
- Distant service teams: Lacking approved agents within fifty miles.
- Utility mandates: Warranties voided by hard water or minor voltage drops.
Once your investments are protected, you must strategically fit them into your available square footage.
Space-Saving Gear for the 'Micro-Kitchen'
Securing a small cafe or food truck means your square footage is precious, making commercial kitchen layout optimization your ultimate survival tool. When floor space runs out, you must look up and embrace verticality in design—the practice of building your equipment upward rather than outward. Adding overshelves transforms the empty air above prep tables into vital storage for dry ingredients and plating tools. Similarly, choosing wall-mounted equipment keeps your counters clear and ensures the floor remains completely unobstructed for faster mopping at closing time.
Down low, you can reclaim just as much real estate using smart space-saving appliances for small kitchens. Installing undercounter refrigerators directly beneath the workstation eliminates the dozens of daily steps a cook takes walking to a back cooler. You can maximize this strategy with a "Chef Base"—a low-profile refrigerator sturdy enough to hold heavy cooking equipment like griddles directly on its top. Tightly packing these machines together inevitably increases their operating temperatures. This makes strict preventative maintenance essential for long-term survival.
Preventative Maintenance: Making Your Gear Last 15 Years, Not 5
Neglecting preventative maintenance for kitchen machinery is the fastest way to turn a profitable month into a financial disaster. Behind your commercial fridge sits a grid of metal tubes called condenser coils, which release the heat pulled from inside the unit. If these coils get choked with kitchen grease and dust, the motor works twice as hard, risking a complete breakdown. Brushing them clean takes ten minutes but can reduce your energy bills by 15%. Similarly, protecting your cooking line demands routine care to maintain the cost-effectiveness of high-efficiency fryers; filtering your oil daily prevents the hard carbon buildup that destroys internal heating elements.
Beyond daily wiping, you need a "Deep Clean" schedule your staff can actually follow without feeling overwhelmed. A critical, often-missed task is thermostat calibration—using an independent thermometer to verify your oven's dial matches its actual internal temperature, ensuring consistent food quality. Implement this monthly "Health Check" calendar for core equipment:
- Week 1: Vacuum all refrigerator condenser coils.
- Week 2: Calibrate oven and griddle thermostats.
- Week 3: Boil out fryer vats and inspect elements.
- Week 4: Descale the dishwasher to prevent mineral clogs.
With maintenance scheduled, you can finalize your equipment acquisition plan.
The Final Walkthrough: Your 30-Day Equipment Acquisition Plan
You no longer have to look at a blank floor plan and guess. By letting your menu dictate your footprint and prioritizing throughput (meals served per hour) and durability (years of service), you can confidently invest in the right restaurant equipment. You have successfully transformed a daunting catalog of stainless steel into a calculated business strategy.
However, you must avoid the classic "Footprint Fail" before signing the final invoice. Imagine buying the perfect double-door refrigerator, only to discover on delivery day that it is two inches too wide to fit through your front entrance. Successfully outfitting your restaurant means planning for the physical reality of moving heavy machinery into tight spaces.
To ensure a smooth transition from an empty room to a functional cooking line, follow this setup action plan:
- Measure access points: Measure every doorway and hallway before the delivery truck arrives.
- Inspect immediately: Check for hidden shipping damage before signing any freight paperwork.
- Perform a "Test Fire": Run all gas and electric gear to verify temperatures before the health inspector arrives.
- Verify connections: Confirm all utility hookups are secure and properly ventilated.
- Create a "Kitchen Bible": Secure all manuals, maintenance logs, and warranty cards in one centralized binder.
Your kitchen is the engine of your business. Apply this delivery checklist immediately to protect your new assets and build confidence in your workflow. You now possess the practical knowledge to build a safe, efficient, and profitable workspace—now it is time to turn the burners on.